Make Your Own Plunking Slider

by Larry Ellis
1-27-2018
Website
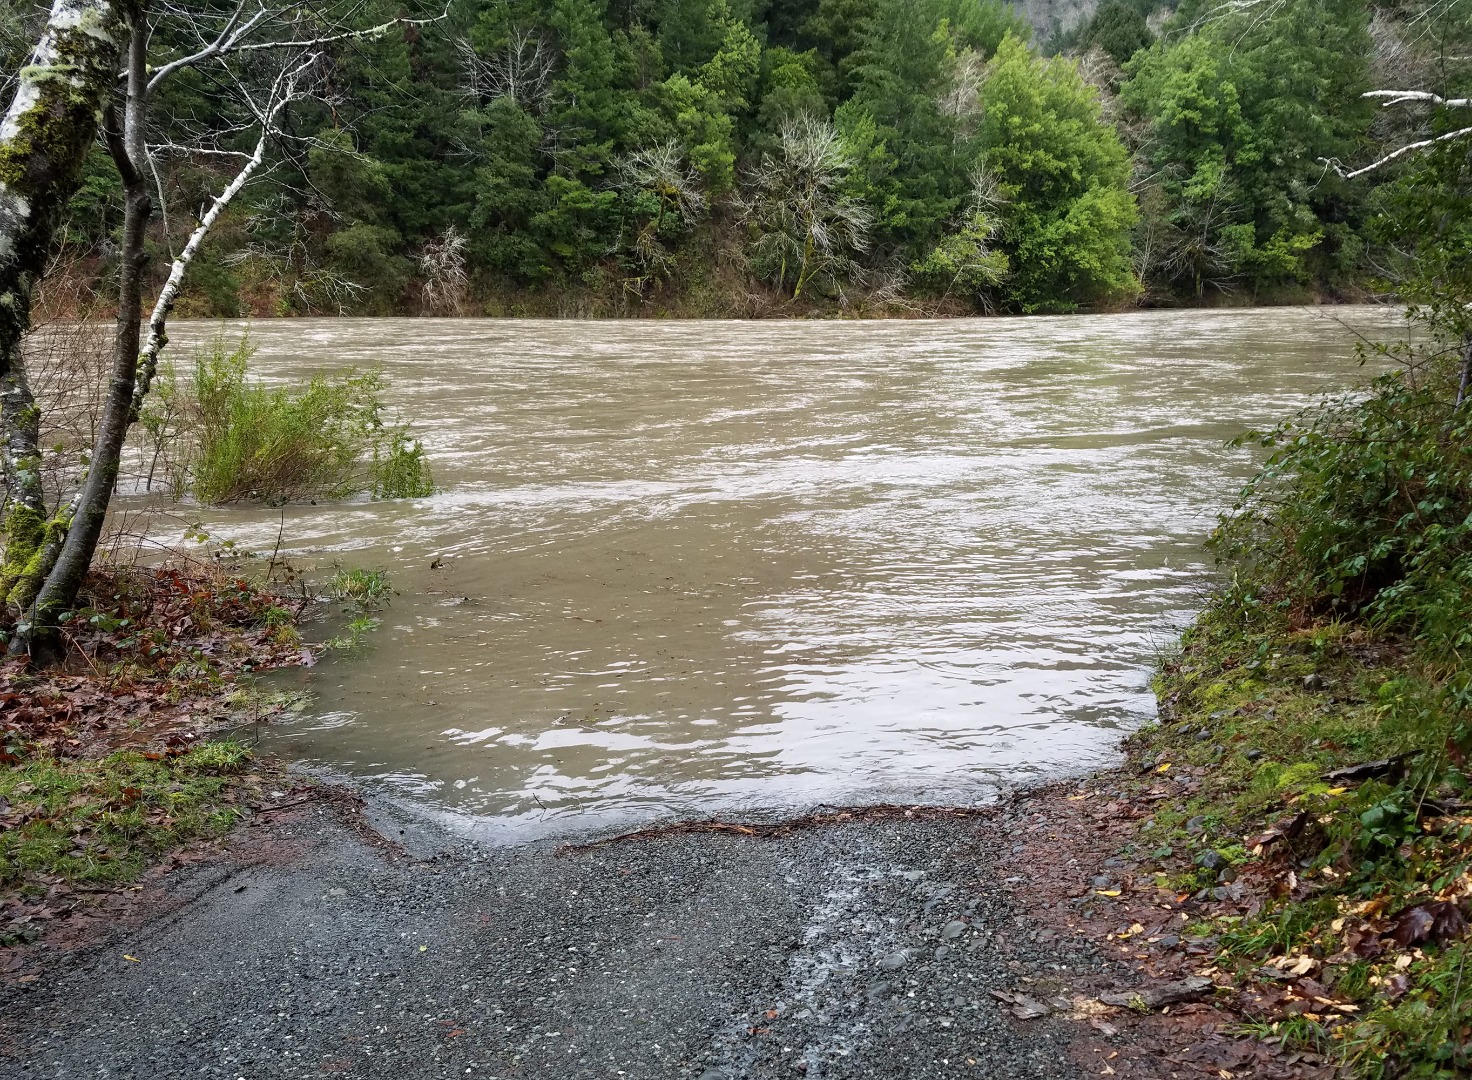
With all the high water Oregon and California rivers have been experiencing this week, the first anglers who will be taking advantage of the high-water conditions will inevitably by those who are plunking Spin-N-Glos from the bank.
So being the resourceful fishermen that we are, everybody's going to take advantage of the latest fad on the water. For the last few years now, plunkers have been rigging up their own sliders for their plunking rigs.
And this is no fad. These things really do work well. Why not make your own?
This is a very inexpensive setup. You're going to need to buy a few things from the local tackle and hardware stores.
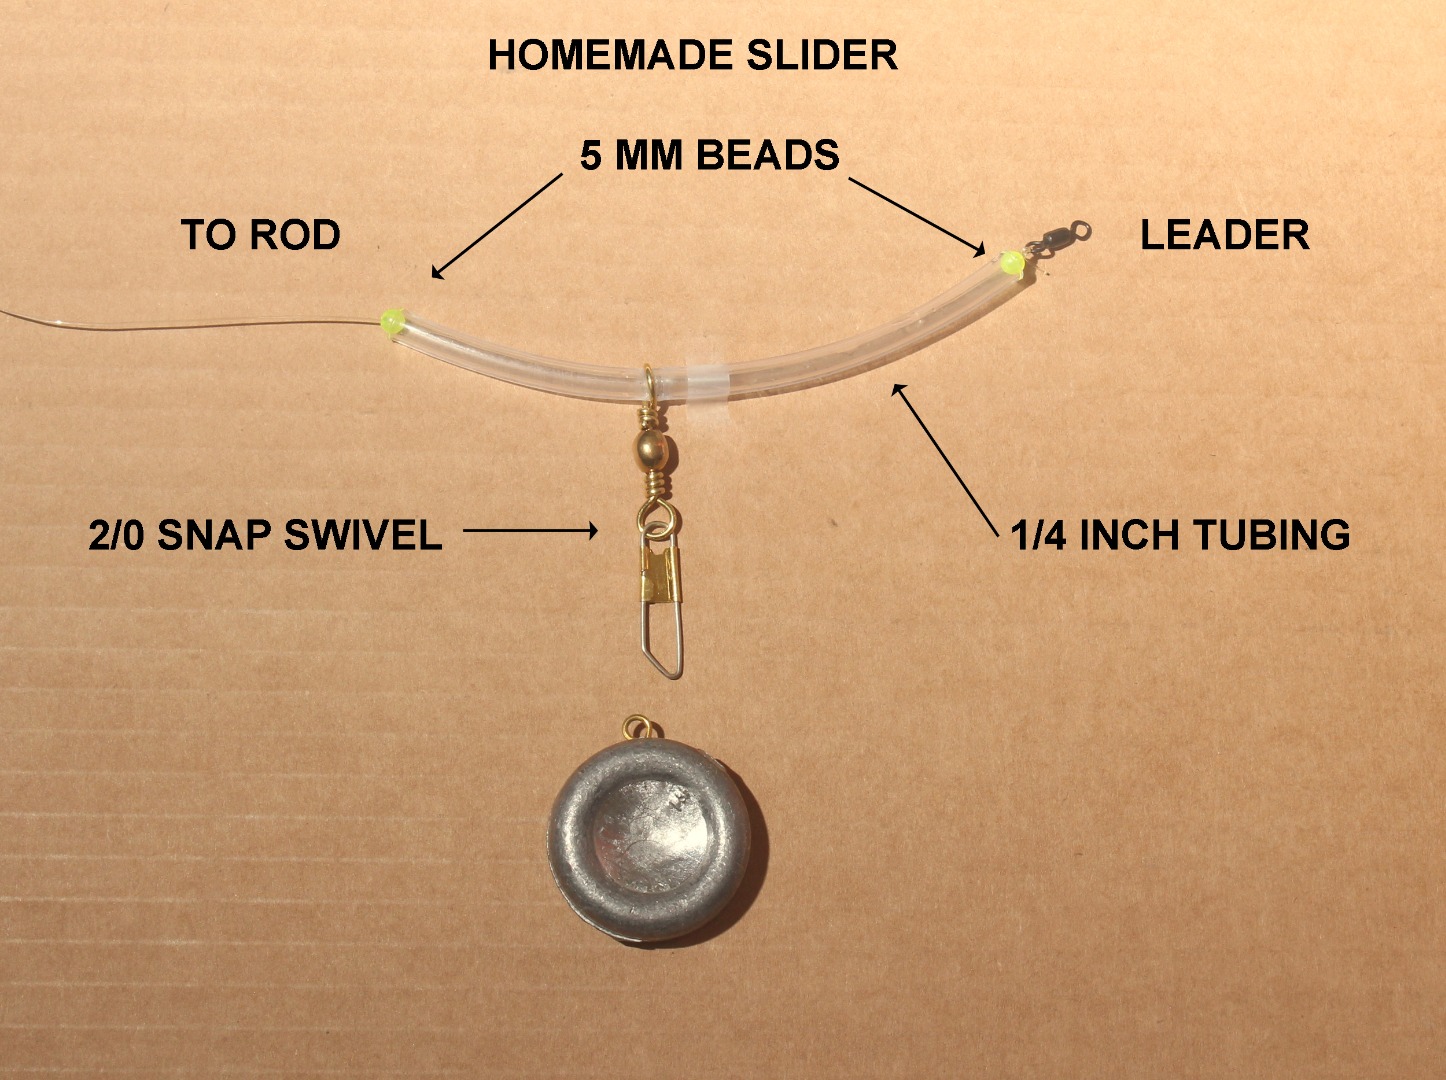
First of all, you're going to need some 1/4" inch clear plastic tubing, similar to the kind that folks use for their aquariums. You'll find plastic tubing at your local hardware store. This is the least expensive item, so why not buy about 5 feet and plan on making a slug of these things when the river is too high to fish?
Chances are you already have the next least-expensive item to use as bearings on the bottom of your Spin-N-Glos, specifically 5 mm beads. I like to use a 5 mm bead at the beginning and end of my slider. The bead color doesn't matter - whatever you happen to have in your tackle boxes will fork fantastically.
Now you will need to get some 2/0 snap swivels, the kind that Eagle Claw or Danielson makes.
That's all you need. Here's how to rig up your own personal slider.
First, cut your tubing into 6-inch sections. You are going to want to square the ends up at a 90-degree angle, so you will end up with pieces that are about 5-1/4 inches to 5-1/2 inches long. You can get about 10 sliders out of 5 feet of tubing.
Square the ends up using a good pair of side cutters or needlenose pliers.
Now, take the end eye of a snap swivel and squeeze the tubing through the eye. This is the hardest part, but with a little practice you'll get pretty good at it. You want the tubing to fit snuggly inside the eye of the snap swivel.
After you've inserted the tubing through the eye, pull the tubing gently by twisting the eye of the snap swivel around the tubing. You are going to want the eye to be approximately 1/3 of the way up the tubing. This shorter end will be facing the rod.
You will notice that the tubing has a natural curl to it. Do not try and take the curl out of the tubing (you couldn't do so if you wanted to anyway) but use this curl to your advantage.
I like the curl of the tubing to bend from the river bottom toward the surface. This will keep your line from dragging on the rocks and becoming nicked. You can adjust the angle of the bend by turning the tubing inside the eye of the snap swivel.
Everybody has their own special way of rigging up. Here's the way I do it.
First of all, slide a 5mm bead up your mainline. Pass your mainline through your tubing and then slide another 5 mm bead down onto the mainline (after going through the tubing) before tying your mainline off to a size 7 crane swivel.
Since the mainline is already passing through the tubing, I like to squeeze those 5 mm beads about half way into the tubing, being careful that the hole of the bead is facing outward. I feel that by performing this procedure, you will keep a lot of leaves off of your mainline, and if leaves and debris do accumulate, they will only cluster up onto the beginning of the slider.
Now rig up your 3- to 4-foot leader going to a Gamakatsu 1/0 octopus style hook using either an egg loop knot or a snell knot.
Now slide down a 4 mm bead onto your hook to act as a bearing against the rapidly-spinning Spin-N-Glo. The number 4 Spin-N-Glo of course slides down onto the bead.
Now tie your leader to the end of the size 7 crane swivel at the end of your mainline, make your cast, and then set your rod in a nice, sturdy rod holder.
That's it! Easiest rig in the world to make.
Wait for some high water to drop to perfection vis and hit the stream of your dreams.
As for the Chetco, I did personally witness this rig work its magic at Loeb Park on Tuesday when the river was flowing at 5,000 cfs.
One angler got hooked up with a chrome-bright metalhead around 4 pm, and it was as massive as every steelheader dreams about. The angler fought the fish for about 20 minutes until the line finally broke. We all saw the fish. It was about 4-feet away from the net and it looked to be at least 17 pounds or larger.
So when the river starts dropping a few days after the big rise, probably around Monday or Tuesday - plunking will be the technique that rules the Chetco.
As a side note, dues for the Oregon South Coast Fishermen starts at $20.00 a year for an individual or $30.00 for the entire family. This is a really good deal because it also includes a free boat launch at the popular Ice Box Hole just above Loeb Park. There are other levels of membership fees as well, including lifetime memberships.
You never know who are going to be giving seminars and/or talks at these meetings. It might be an ODFW Commissioner or it could be one of the members demonstrating a how-to technique for steelhead or salmon. For more information visit the OSCF website at oregonsouthcoastfishermen.com.
Tight lines!
Larry Ellis, author, writer, columnist and photographer has had a 50-year passion for fishing in California and Oregon's saltwater and freshwater venues. He is a well-known writer for Oregon, Washington and California Fishing and Hunting News, Northwest Sportsman, California Sportsman and Pacific Coast Sportfishing. He currently writes monthly for Salmon Trout Steelheader Magazine, and is the author of two books, "Plug Fishing for Salmon" and "Buoy 10, the World's Largest Salmon Run." Both books can be bought from Amato Publications (amatobooks.com), Amazon and eBay. Ellis particularly loves living in his hometown of Brookings, Oregon - The heart of salmon country and gateway to fishing paradise.
Photos
Website Hosting and Design provided by TECK.net
